ghost 블로그에 giscus 댓글 추가하는 법


ghost는 기본적으로 멤버 전용 댓글 시스템만 있다. 그래서 disqus, giscus, utterrances 등 다른 댓글 서비스를 이용해야 ghost 멤버 시스템과 별개로 댓글을 달도록 할 수 있다.
ghost 호스팅 서비스를 사용할 때 giscus를 이용해 템플릿 파일(post.hbs 등)을 수정하지 않고 댓글을 추가해보는 방법을 알아보자.
giscus 소개

giscus는 깃허브 리파지토리의 디스커션(Discussion)을 이용한 댓글 시스템이다. GitHub 로그인을 해야만 댓글을 쓸 수 있어 유연하면서도 스팸을 어느정도 막을 수 있다.
- giscus: https://giscus.app/ko
giscus 설치
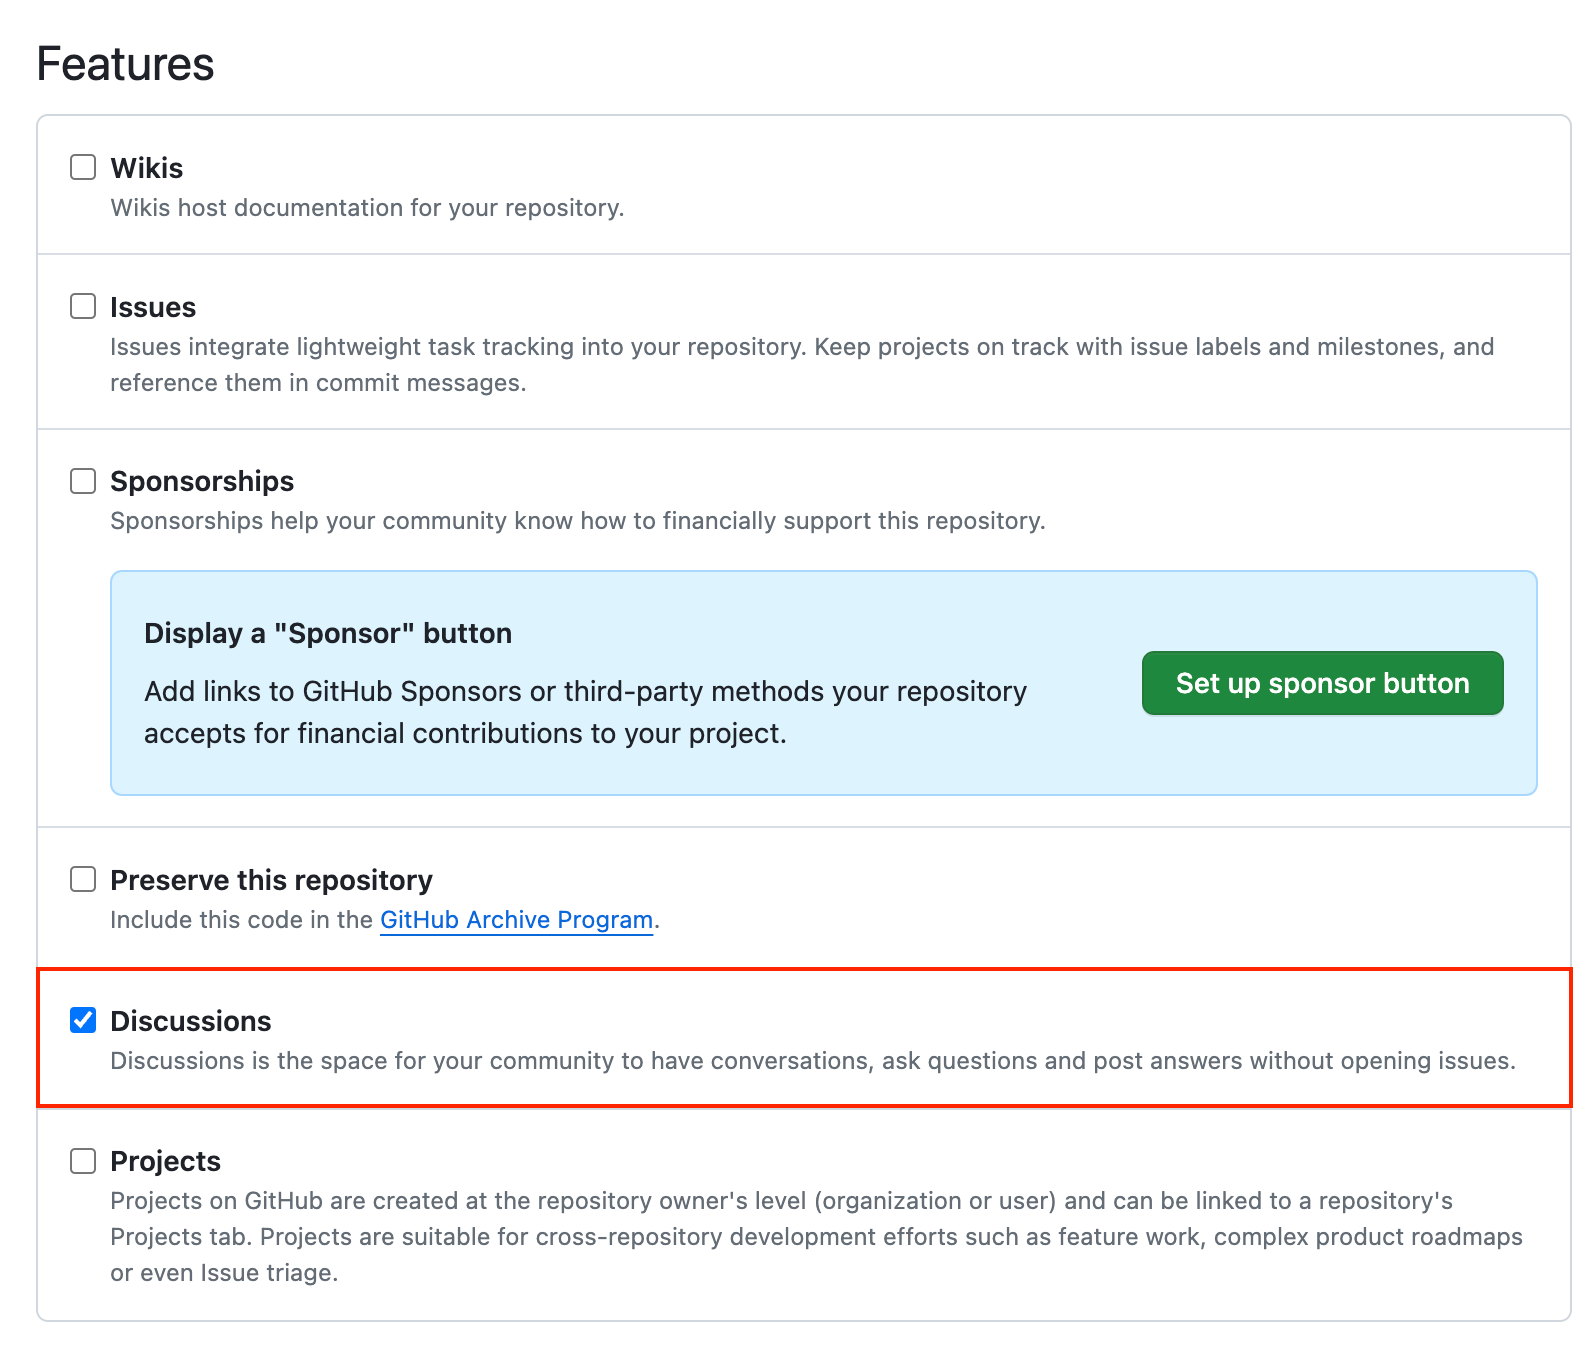
먼저 댓글을 저장할 깃허브 리파지토리를 만들고, Discussion을 활성화 시킨다 리파지토리는 public이어야 한다.
그 다음, giscus app을 해당 리파지토리에 설정한다.

<script src="https://giscus.app/client.js"
        data-repo="[ENTER REPO HERE]"
        data-repo-id="[ENTER REPO ID HERE]"
        data-category="[ENTER CATEGORY NAME HERE]"
        data-category-id="[ENTER CATEGORY ID HERE]"
        data-mapping="pathname"
        data-strict="1"
        data-reactions-enabled="1"
        data-emit-metadata="0"
        data-input-position="bottom"
        data-theme="preferred_color_scheme"
        data-lang="ko"
        crossorigin="anonymous"
        async>
</script>
여러 설정값은 자신에게 맞는걸로 선택한다
다음은 giscus.app에서 여러 설정값을 고르고, 마지막으로 script를 복사해 댓글이 들어갈 위치에 복사해주면 된다.
template을 수정한다면 그냥 글 아래에 이 스크립트를 넣으면 된다.
하지만 템플릿을 수정할 수 없다면 조금 신경써서 넣어줘야 한다.
<!-- giscus -->
<script>
  (function () {
    if (location.pathname === '/') {
      return;
    }

    const siteMain = document.getElementsByClassName('site-main')[0];
    if (siteMain) {
      const divTagWithStyle = document.createElement('div');
      divTagWithStyle.classList.add('gh-content');
      divTagWithStyle.classList.add('gh-canvas');
      siteMain.appendChild(divTagWithStyle);

      const scriptTag = document.createElement('script');
      scriptTag.setAttribute('src', 'https://giscus.app/client.js');
      scriptTag.setAttribute('data-repo', 'joe-brothers/blog-comments');
      scriptTag.setAttribute('data-repo-id', 'R_kgDOLQfD8g');
      scriptTag.setAttribute('data-category', 'Comments');
      scriptTag.setAttribute('data-category-id', 'DIC_kwDOLQfD8s4CdG_k');
      scriptTag.setAttribute('data-mapping', 'pathname');
      scriptTag.setAttribute('data-strict', '1');
      scriptTag.setAttribute('data-reactions-enabled', '1');
      scriptTag.setAttribute('data-emit-metadata', '0');
      scriptTag.setAttribute('data-input-position', 'top');
      scriptTag.setAttribute('data-theme', 'preferred_color_scheme');
      scriptTag.setAttribute('data-lang', 'ko');
      scriptTag.setAttribute('data-loading', 'lazy');
      scriptTag.setAttribute('crossorigin', 'anonymous');
      scriptTag.setAttribute('async', '');
      divTagWithStyle.appendChild(scriptTag);
    }
  })();
</script>
위 스크립트는 '글 본문' element를 찾아 그 다음에 giscus script가 들어가도록 만든 스크립트다. 기본 테마(capser)에서 giscus 폭이 100%로 되어 이쁘지 않기 때문에 본문과 동일한 class(gh-content, gh-canvas)의 div로 한겹 감싸주었다.
이런식으로 스크립트를 만들어서 Footer에 넣으면 끝이다.
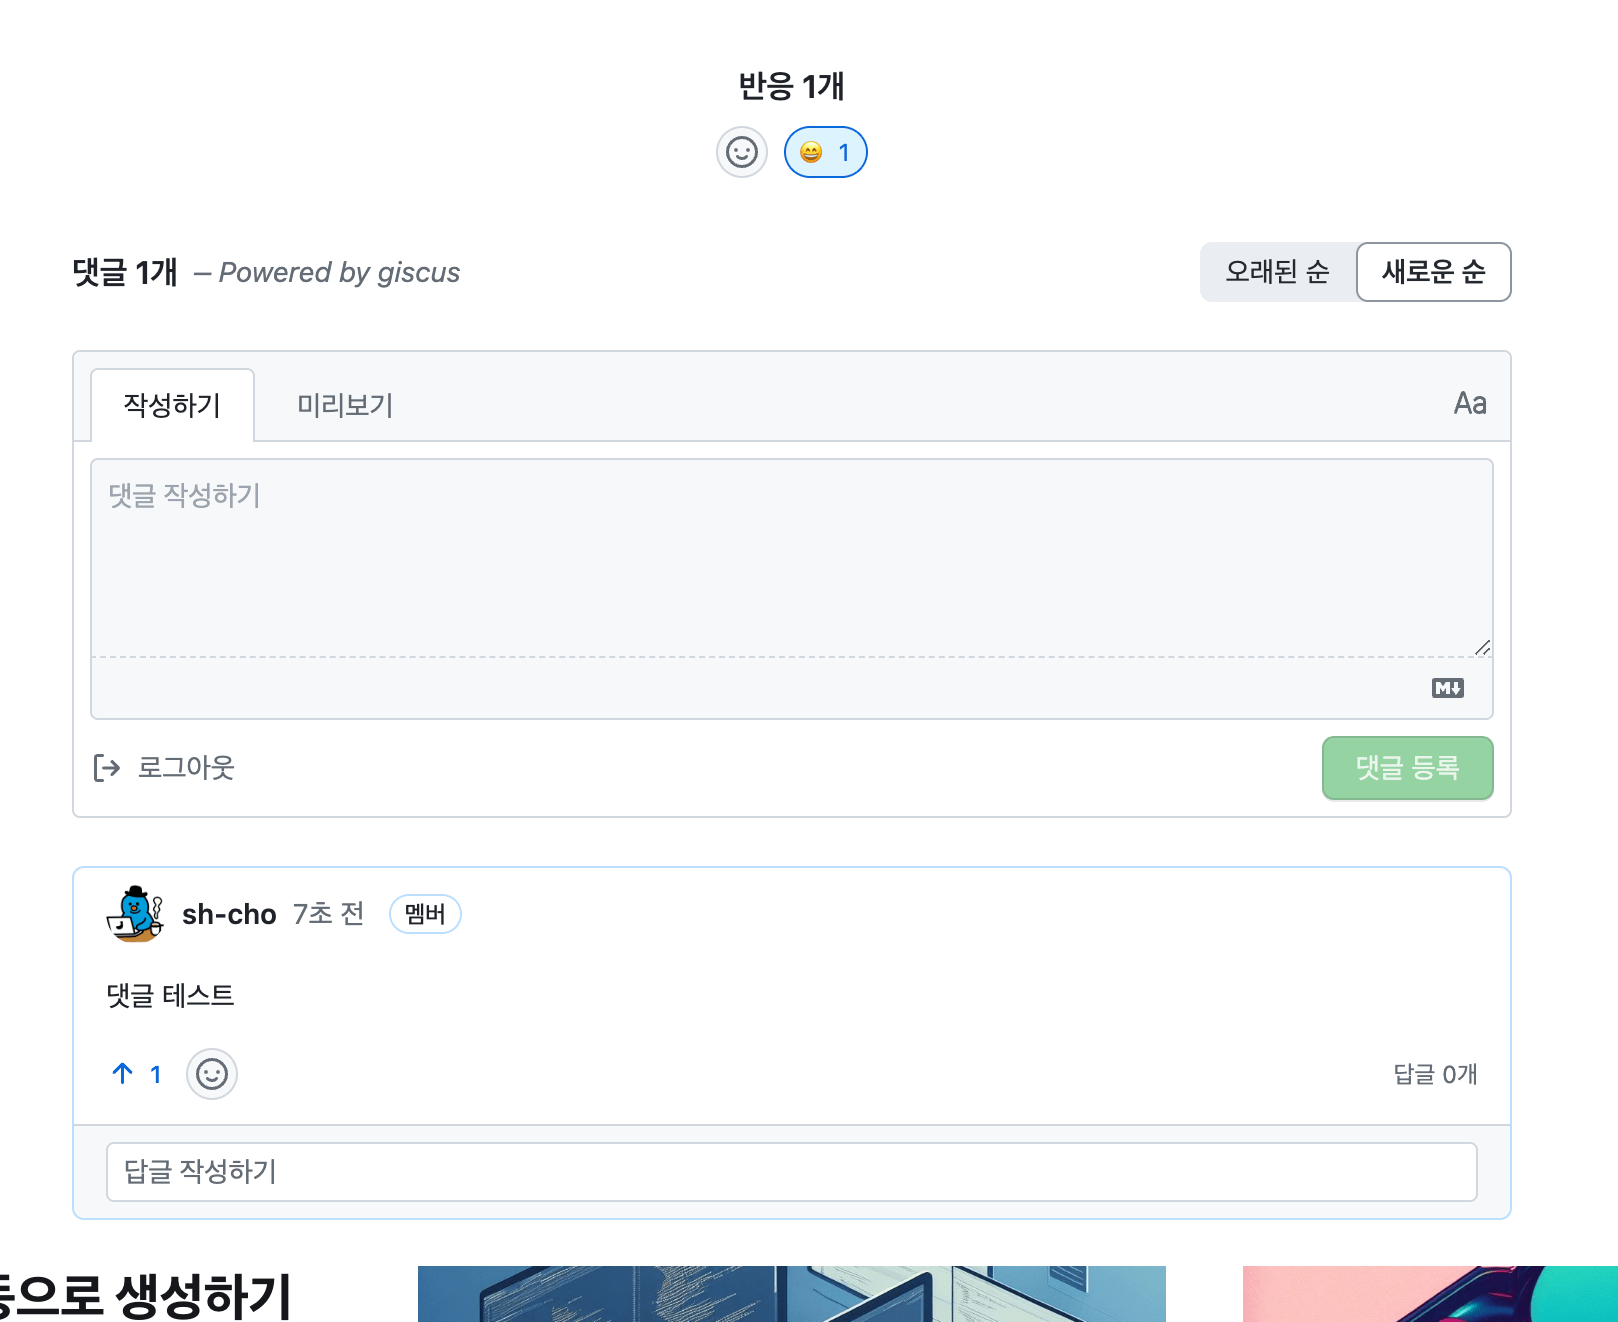
아래는 giscus 예시
추가 설정
댓글용 리파지토리의 giscus.json 파일을 이용해 추가 설정을 할 수 있다
(참고 - https://github.com/giscus/giscus/blob/main/ADVANCED-USAGE.md)
- origins: giscus를 사용할 수 있는 도메인 목록
- originsRegex: giscus를 사용할 수 있는 도메인 목록 (+regex)
- defaultCommentOrder: 기본 댓글 순서(newest, oldest). 기본값은 oldest다