더 나은 스크립팅, google zx

A tool for writing better scripts - zx
 google
개발, 운영시 스크립트를 많이 만들어 쓴다. 해 본 사람은 알겠지만 bash 스크립트 만들어 쓰는건 굉장히 번거롭고 기능도 몇개 없고.. 쉽지 않다.
더 복잡한 스크립트를 만들땐 다른 편리한 언어를 사용하는 일이 많다. 보통 python이나 javascript를 많이 쓰는데, javascript의 경우 Node.js 라이브러리를 사용하기 전 여러가지 작업이 필요해 사용이 조금 불편하다..
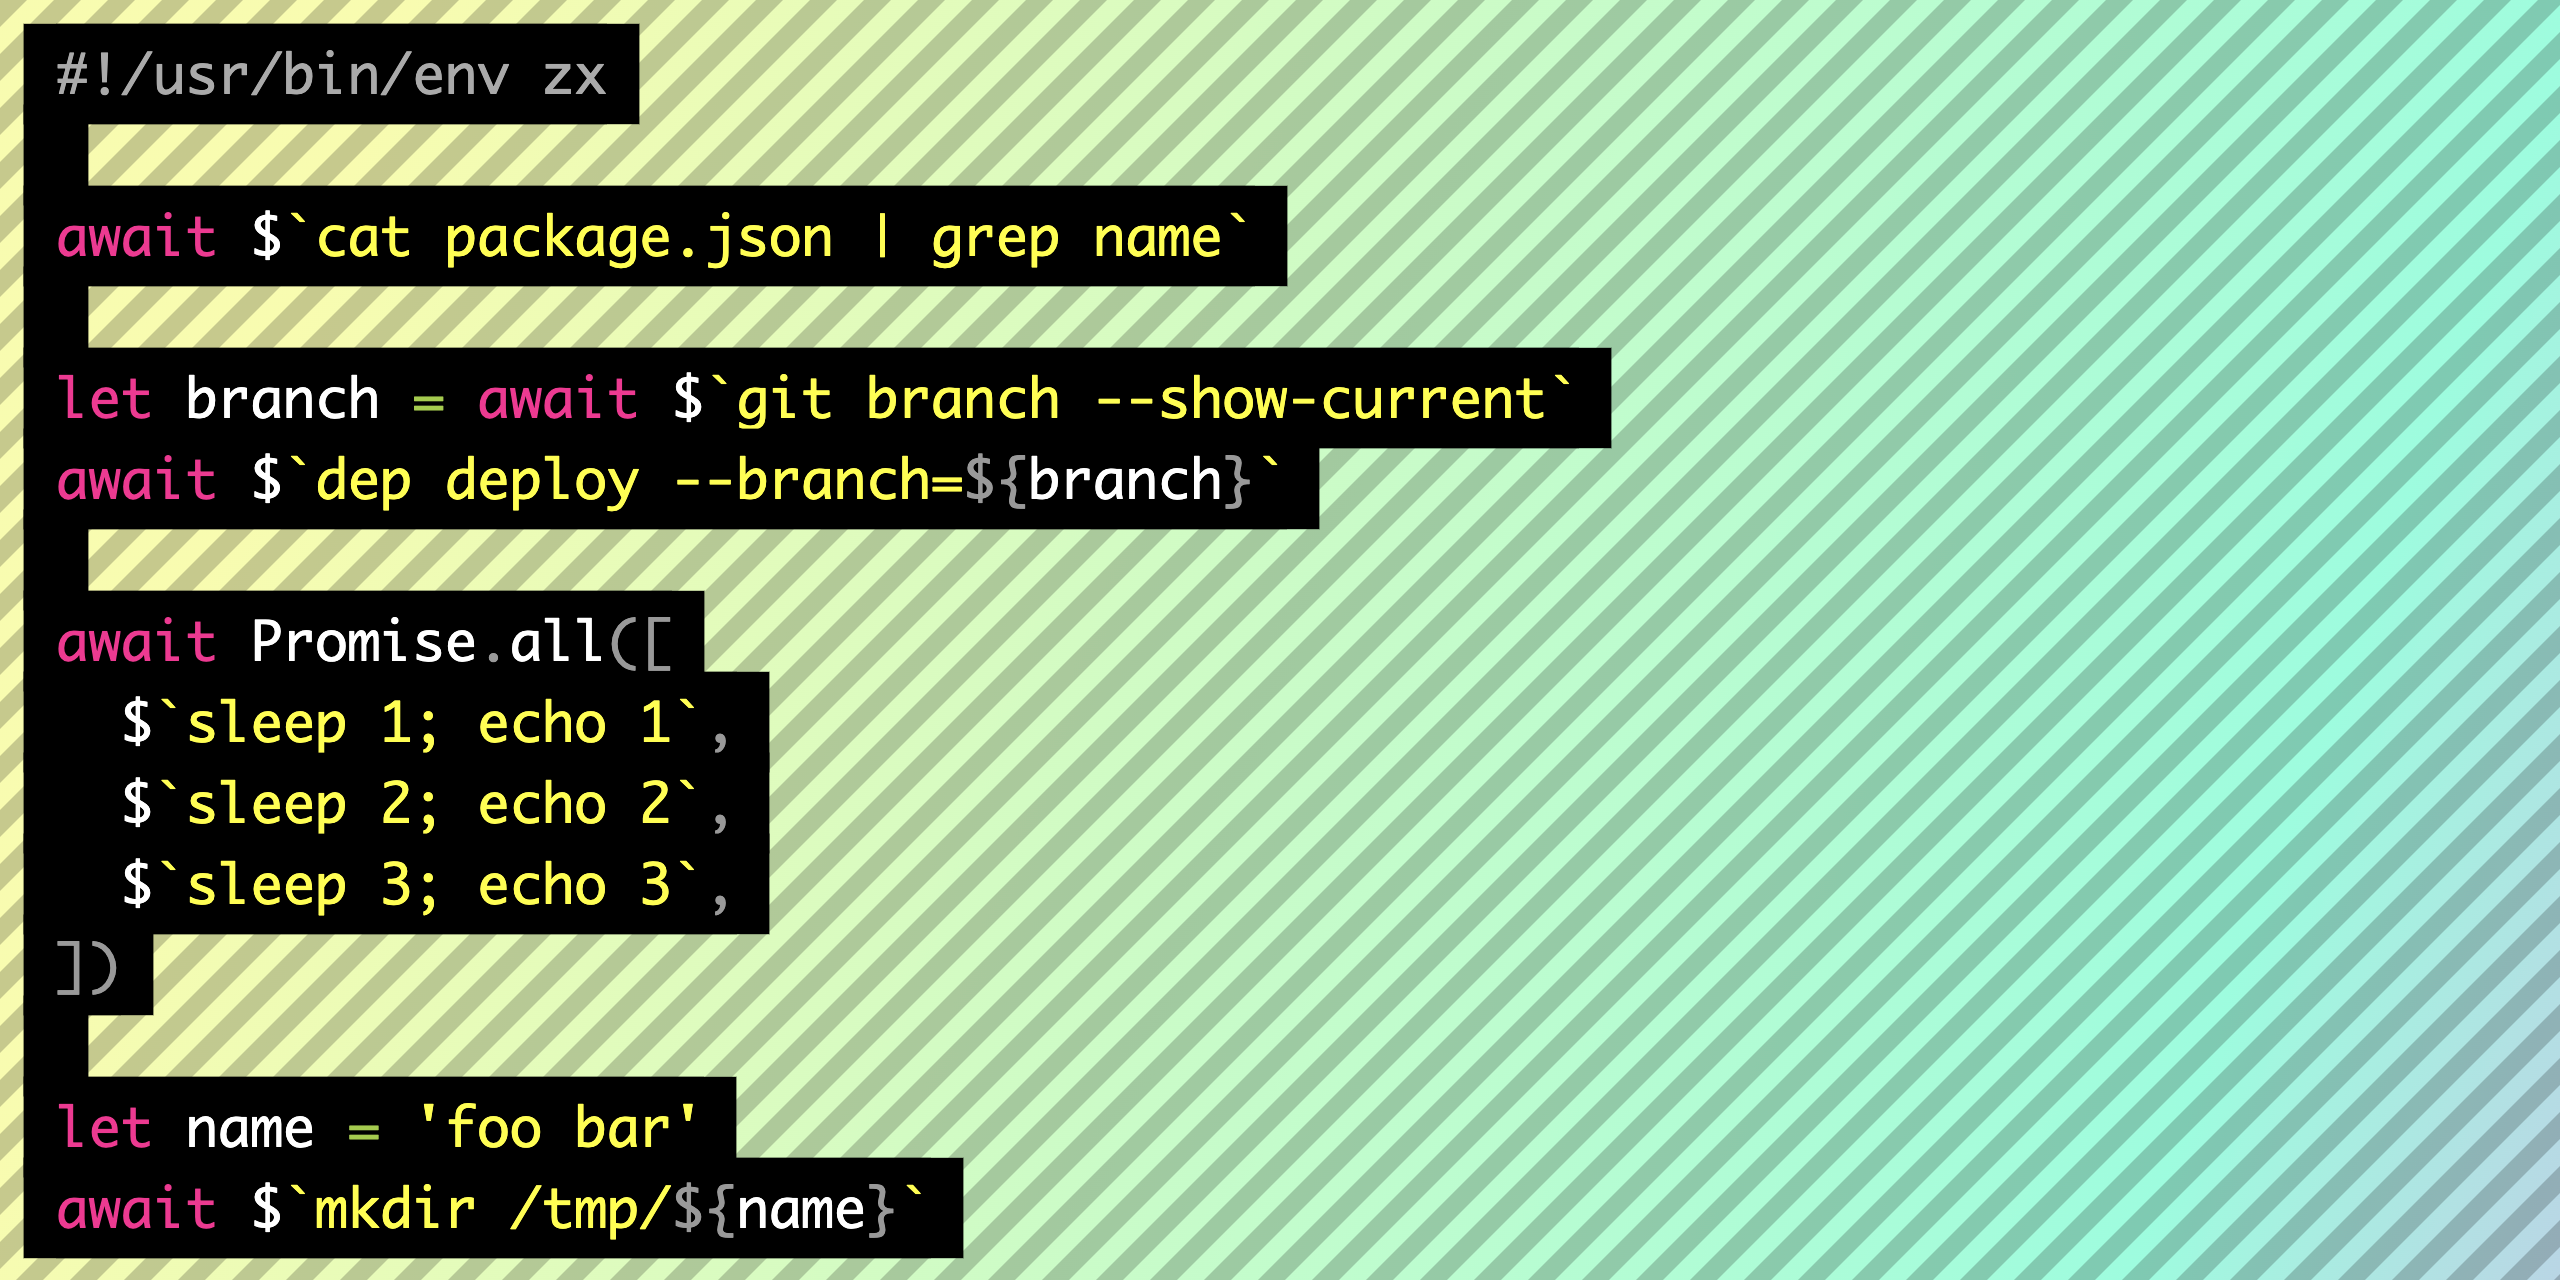
#!/usr/bin/env zx

await $`cat package.json | grep name`

let branch = await $`git branch --show-current`
await $`dep deploy --branch=${branch}`

await Promise.all([
  $`sleep 1; echo 1`,
  $`sleep 2; echo 2`,
  $`sleep 3; echo 3`,
])

let name = 'foo bar'
await $`mkdir /tmp/${name}`Google SRE가 만든 zx라는 npm 패키지를 이용해 더 쉽게 자바스크립트 스크립팅을 할 수 있다. zx 패키지는 child_process 의 여러 래퍼를 제공한다.
위 예시 스크립트를 보면 여러 명령어를 $ 함수로 실행할 수 있고, 실행 결과를 변수에 담아 편리하게 활용이 가능하다.
shell 에서 실행되는 명령어는 bash에서 입력하는 것을 그대로 사용하면 되며, bash가 아닌 다른 shell을 사용하는 것도 설정이 가능하다.
설치
Homebrew
brew install zxnpm
npm i -g zxNote: node 16 이상 버전부터 사용 가능
사용법
#!/usr/bin/env zx스크립트 확장자는 .mjs , 스크립트 시작 부분에 위와 같은 shebang을 추가해 작성한다.
chmod +x ./script.mjs
./script.mjs
위처럼 실행 권한을 주고 실행한다.
zx ./script.mjs또는 zx 바이너리로 실행해도 된다.
 zx 7.2.1
   A tool for writing better scripts

 Usage
   zx [options] <script>

 Options
   --quiet              don't echo commands
   --shell=<path>       custom shell binary
   --prefix=<command>   prefix all commands
   --eval=<js>, -e      evaluate script
   --install, -i        install dependencies
   --experimental       enable experimental features
   --version, -v        print current zx version
   --help, -h           print help
   --repl               start repl
실행시 여러 옵션을 줄 수 있고, 스크립트 내에서 직접 설정도 가능하다.
예를 들어 --quiet 옵션을 true로 주고 싶다면 zx --quiet script.mjs 처럼 CLI 파라미터로 넘기거나, 또는 스크립트 내에서 $.verbose = false 로 쓰는 방법이 있다.
(참고: https://github.com/google/zx#configuration)
기타 자세한 내용은 zx 리파지토리 README를 참고하자.
import 'zx/globals'추가적으로 zx의 모든 함수($, cd, fetch 등)는 import 없이 사용 가능하지만, vscode에서 자동완성이 안되기 때문에 위처럼 import 한 줄 추가하는 것이 좋다.
- chalk (https://www.npmjs.com/package/chalk)
- fs (https://www.npmjs.com/package/fs-extra)
- os (https://nodejs.org/api/os.html)
- path (https://nodejs.org/api/path.html)
- globby (https://github.com/sindresorhus/globby)
- yaml (https://www.npmjs.com/package/yaml)
- minimist (https://www.npmjs.com/package/minimist)
- which (https://github.com/npm/node-which)
그리고 위 패키지들은 zx에 내장되어 있어 import 하지 않고도 사용이 가능하다.
스크립트 예시
1) 단순 ver
#!/usr/bin/env -S zx --install

import 'zx/globals';

$.verbose = false

/// chalks
const info = chalk.bold.cyan
const success = chalk.bold.green
const warning = chalk.bold.yellow

const input = await question(info('스크립트를 실행하시겠습니까? (Y/n): '))
if (input !== 'y' && input !== 'Y') {
  echo('스크립트를 종료합니다.')
  process.exit(0)
}

await spinner(info('Loading...'), () => $`sleep 3`)

/// pid min, max 갖고 오기
const { stdout } = await $`ps -ax | awk '{print $1}' | uniq | sort -n | tail -n +2`
const lines = stdout.split('\n').filter(line => line)
const pids = lines.map(line => parseInt(line, 10))

const minPid = Math.min(...pids)
const maxPid = Math.max(...pids)

echo`Min PID: ${minPid}`
echo('Max PID:', maxPid)

/// cd & try catch
try {
  cd('foo_bar')
  echo(success(`폴더가 존재합니다.`))
} catch (p) {
  echo(warning(p))

  const input = await question(info('폴더를 만드시겠습니까? (Y/n): '))
  if (input !== 'y' && input !== 'Y') {
    process.exit(1)
  }

  await $`mkdir foo_bar`
  echo(success('폴더 생성 완료'))
}
입출력, 커맨드 실행, return code 0이 아닌 경우 등이 들어간 예제 스크립트를 만들어봤다. 실행은 ./test.mjs 또는 zx test.mjs로 한다.
pid min, max를 가져오고 폴더 존재 여부를 확인한 뒤 없으면 만드는 스크립트이다. 중간엔 어떤 긴 프로세스가 실행되는 것을 가정하고 spinner도 넣었다.
커맨드 실행시 exit code가 0이 아니면 예외를 던지는데, ProcessOutput 이라는 클래스로 래핑된다
#!/bin/bash

read -p "Start this script? (Y/n): " start_script

if [[ $start_script =~ ^[Yy]$ ]]; then
    min_pid=$(ps -ax | awk '{print $1}' | uniq | sort -n | tail -n +2 | head -n 1)
    max_pid=$(ps -ax | awk '{print $1}' | uniq | sort -n | tail -n 1)

    echo "Minimum PID: $min_pid"
    echo "Maximum PID: $max_pid"

    if [ ! -d "foo_bar" ]; then
        echo -e "\e[33mWarning: folder doesn't exist\e[0m"
        read -p "Do you want to create the folder? (Y/n): " create_folder

        if [[ $create_folder =~ ^[Yy]$ ]]; then
            mkdir foo_bar
            echo "Folder created successfully"
        fi
    fi
fi
비슷한 스크립트를 bash로 만들면 위와 같다
예제를 잘못 만들었다.. 이 경우엔 bash가 코드도 짧고 간결해 보인다.
하지만 spinner는 추가하지도 못했고, chalk 대신 ANSI escape code를 써서 색깔을 넣어 불편한 점이 있다. 또한 bash에 익숙하지 않다면 중간 중간 if [[ ]], =~, if [ ! -d ... ] 등의 의미도 이해하기 힘들다.
2) 약간 더 복잡한 ver
병렬적으로 몇개의 파일을 받는 스크립트를 짜야 한다고 생각해보자. 다운로드에 실패한 경우 그 파일만 로그로 남긴다.
테스트용 파일은 picsum.photos 라는 image placeholder 웹사이트를 썼다.
#!/usr/bin/env -S zx --install

import 'zx/globals';

$.verbose = false

try {
  await $`mkdir pictures`
} catch (p) {
}

cd('pictures')

const will_fail_promise = new Promise((resolve, reject) => {
  sleep(1000)
  reject('TEST_ERROR')
})

await spinner(() => Promise.allSettled([
    $`curl https://picsum.photos/seed/vince/100 -o 1.jpg -L`,
    $`curl https://picsum.photos/seed/vince/200 -o 2.jpg -L`,
    $`curl https://picsum.photos/seed/vince/300 -o 3.jpg -L`,
    will_fail_promise,
  ]).then((results) => {
    // print if failed
    results.forEach((result) => {
      if (result.status === 'rejected') {
        echo(chalk.red.bold(result.reason))
      }
    })
  })
)
자바스크립트로 작성한 zx 스크립트는 위와 같이 curl 프로세스를 여러개 띄워 Promise.allSettled로 실패한 프로세스 reason을 받아올 수 있다.
중간에 테스트를 위해 실패하는 promise를 넣어놨는데 잘 동작한다.
#!/bin/bash

# Create the pictures directory if it doesn't exist and change into it
if [ ! -d "pictures" ]; then
    mkdir "pictures"
fi
cd "pictures" || exit

# Define an array of URLs and corresponding output file names
urls=("https://picsum.photos/seed/vince/100" "https://picsum.photos/seed/vince/200" "https://picsum.photos/seed/vince/300")
outputs=("1.jpg" "2.jpg" "3.jpg")

# Download the files in parallel and save the exit codes
exit_codes=()
for i in {0..2}; do
    curl -s "${urls[$i]}" -o "${outputs[$i]}" -L &
    exit_codes+=($?)
done

# Show a spinner while waiting for the downloads to complete
spinner="/-\|"
i=0
while [ "$(ps -ef | grep curl | grep -v grep)" ]; do
    i=$(( (i+1) %4 ))
    printf "\rWaiting for downloads to complete... %s" "${spinner:$i:1}"
    sleep 0.1
done

# Check for any failures using the saved exit codes
exit_code=0
for i in {0..2}; do
    if [ "${exit_codes[$i]}" -ne 0 ]; then
        echo -e "\033[1;31mDownload of ${urls[$i]} failed with error code ${exit_codes[$i]}\033[0m"
        exit_code=1
    fi
done

exit $exit_codechatgpt를 이용해 동일한 코드를 bash로 짜달라고 해봤다. 구성이 좀 다르긴 하지만 동작은 비슷하다.
일단 큰 개념은 비슷하다. child process를 띄워 각각에서 curl로 다운로드를 받고, exit code를 배열에 담아둔 후 이후 실패한 프로세스가 있는지 확인한다.
exit code를 배열에 미리 담아둔다든가 하는게 필요하고, spinner도 직접 만들어야 하고, 종료 여부도 ps grep으로 체크하고 있다. 중간중간 들어간 ANSI escape 코드도 가독성을 떨어뜨리는 데 한 몫 하고 있다.
사용 후 느낀점
스크립트가 복잡할수록 (여러 자료구조를 쓰거나 async 처리를 하거나 등) zx 스크립트가 bash보다 이점이 더 많아 보인다.
또한 구글 repository에 들어 있고, Google SRE가 유지보수 하는 프로젝트라 유기당할 걱정은 적어 보인다.
다만 스크립트 사용 전, 서버에 node.js 설치와 zx install이 필요하기 때문에 이 점이 약간 번거로울 수는 있다. 그래서 나는 위 스크립트들을 보면 #!/usr/bin/env -S zx --install 로 shebang을 쓰고 있다. 이렇게 하면 실행할 때마다 npm install을 확인하게 된다.
pkg, ncc 등의 툴을 이용해 스크립트와 노드 환경을 미리 빌드해 한 바이너리 파일에 담아 두는것도 괜찮은 아이디어로 보인다. (해보진 않았다)